
UPDATE: This blog is no longer published using Ghost. I use Jekyll + GitHub Pages now.
The following is a short guide to set up a secure Ghost blog on a DigitalOcean droplet running Ubuntu (which is how this blog is set up).
Step 1 - Create the DigitalOcean Droplet
Sign up for a DigitalOcean account if you don’t already have one.
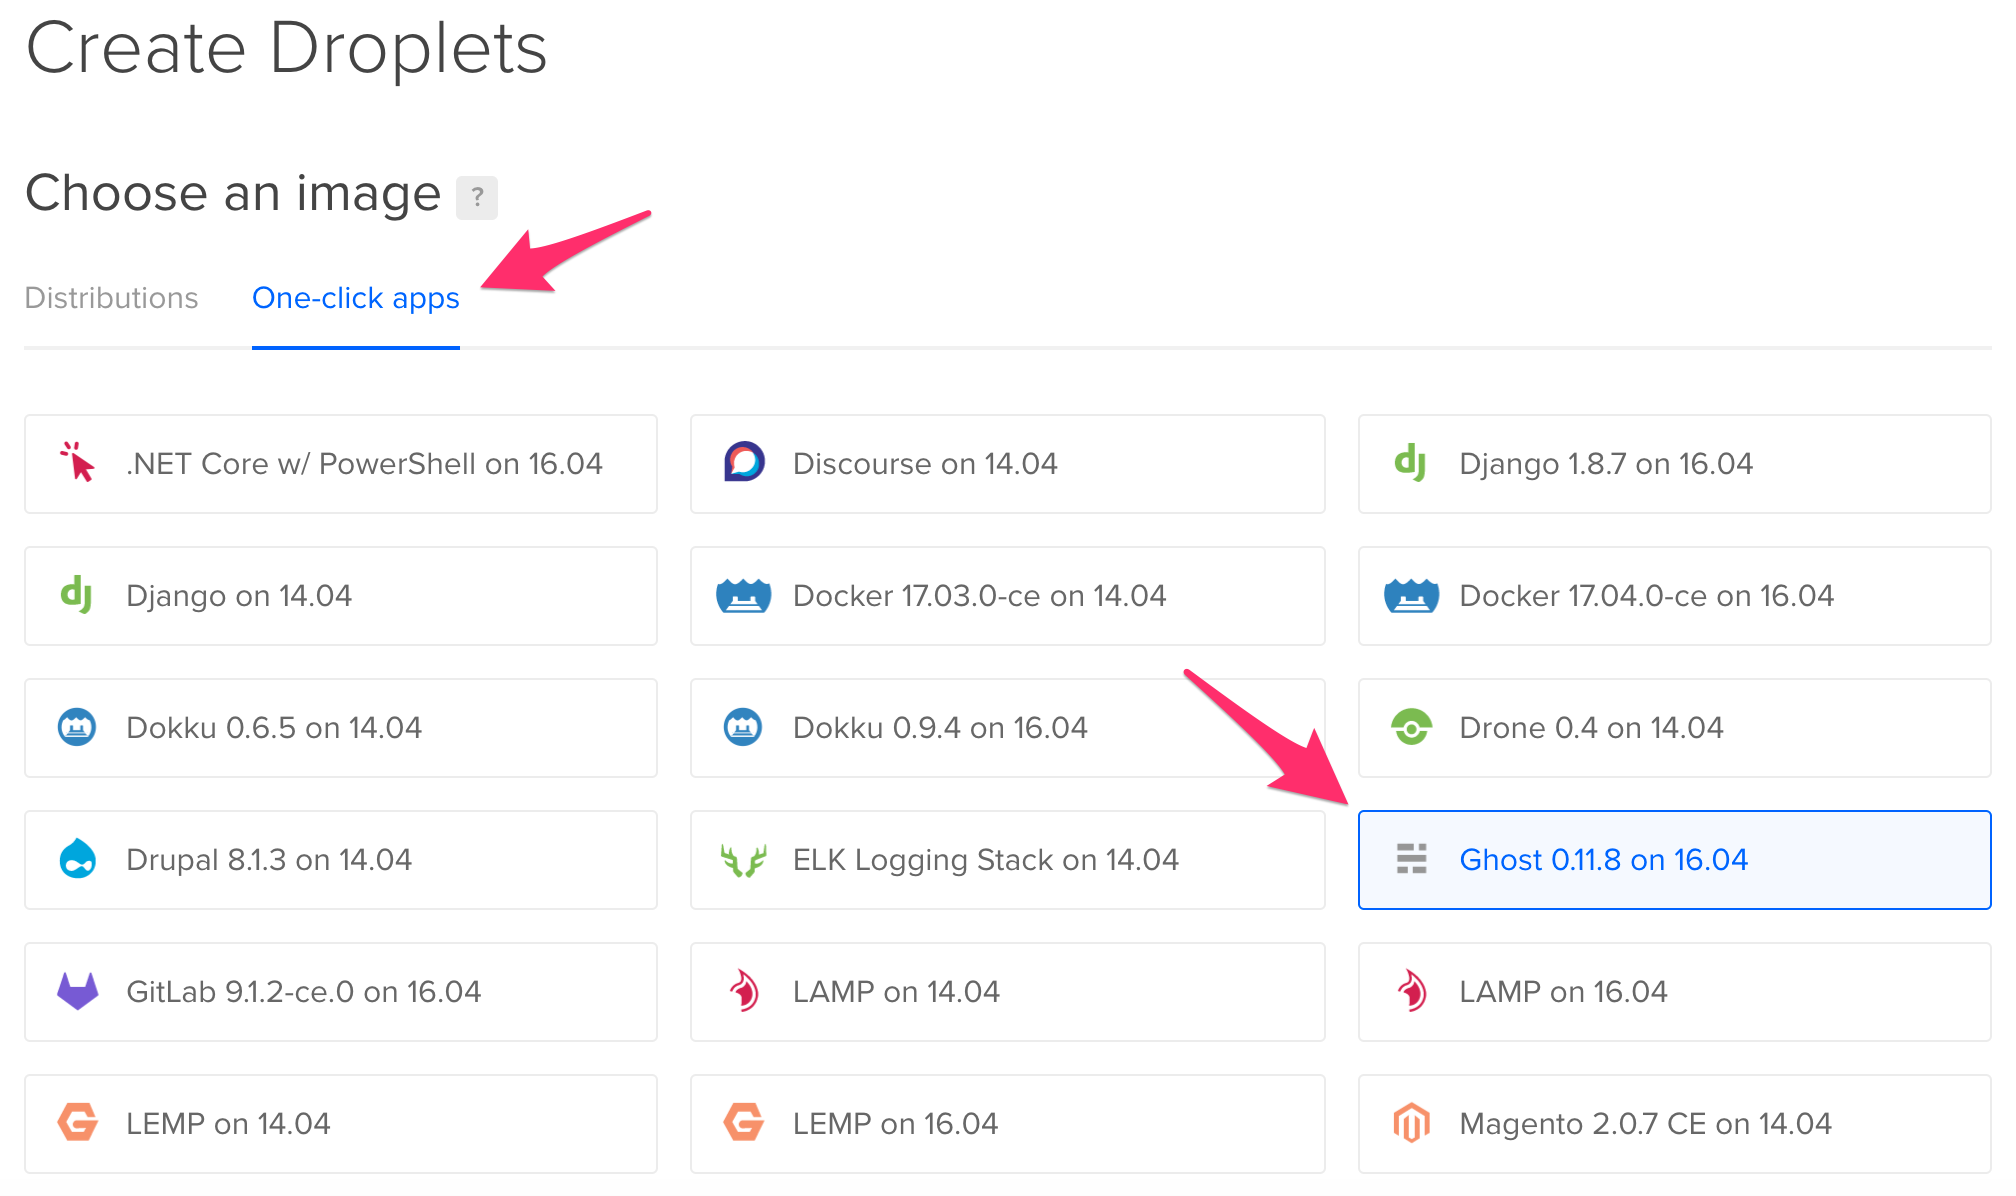
Once you’re logged in, click on the “Create Droplet” button. Choose the “One-click apps” tab when asked to choose an image and select “Ghost xx.xx.x on xx.xx”. This will create a droplet running Ubuntu with everything pre-installed for Ghost.
Next, choose a size (I’m currently using the 1 GB, $10/month size, which is the minimum requirement for Ghost). Select a datacenter (preferably the one closest to you) and choose any additional options that you may like. Finally, pick a hostname (example: ghost-blog) and click “Create”.
Note down the IP address of this newly created droplet.
Step 2 - Set Up a Domain Name
The next step is to point your domain example.com to the droplet. If you don’t own a domain name yet, I recommend buying one from Namecheap.
SSH into your droplet using the credentials provided by DigitalOcean (check your e-mail). Once in, create a new user with sudo privileges so that you won’t have to login as root every time.
# adduser <username>
# gpasswd -a <username> sudo
Terminate your current SSH session and SSH into your droplet with this newly created user.
Once logged in, change the Nginx configuration to match your domain name. Open up the configuration file using sudo nano /etc/nginx/sites-available/ghost and modify the value for server_name.
server {
    listen 80;
    server_name example.com;
    ...
}
Next, change the domain name in Ghost’s configuration file, config.js. Note that the droplet is automatically configured to run in production mode. Open config.js using sudo nano /var/www/ghost/config.js and modify the value for url.
production: {
    url: 'http://example.com',
    mail: {},
    ...
}
Restart Ghost using:
$ sudo service ghost restart
Once Ghost restarts, add an A Record to your domain using your DNS manager that points to your droplet’s IP address. The blog should now be accessible at example.com.
Step 3 - SSL & HTTPS
Since you will be required to login to Ghost’s admin interface using an e-mail address and a password, it’s a good idea to use HTTPS instead of HTTP so that your credentials are not sent in plaintext.
Step 3.1 - Install Let’s Encrypt Client
One way to secure your blog is using Let’s Encrypt, which is a new Certificate Authority that provides an easy way to obtain and install free TLS/SSL certificates, thereby enabling encrypted HTTPS on web servers.
The first step to using Let’s Encrypt to obtain a SSL certificate is to install certbot-auto on the droplet. The certbot-auto Let’s Encrypt client can be downloaded to /usr/local/sbin and executed from there.
$ cd /usr/local/sbin
$ sudo wget https://dl.eff.org/certbot-auto
$ sudo chmod a+x /usr/local/sbin/certbot-auto
Step 3.2 - Obtain a Certificate
A SSL certificate can be obtained using the Webroot plugin, which places a special file in the /.well-known directory within the document root that can be opened (through the web server) by the Let’s Encrypt client for validation. To ensure that the directory is accessible to certbot-auto for validation, the Nginx configuration has to be modified using sudo nano /etc/nginx/sites-available/ghost and the following lines have to be added inside the server block:
server {
    ...

    # certbot-auto
    location ~ /.well-known {
        allow all;
    }
}
Before closing the configuration file, note down the document root, which is the root directive within the server block (default: /usr/share/nginx/html) for later.
Check the configuration file for any errors and if everything is fine, restart Nginx.
$ sudo nginx -t
$ sudo service nginx restart
Next, the SSL certificate can be requested using:
$ certbot-auto certonly -a webroot --webroot-path=/usr/share/nginx/html -d example.com
After certbot-auto initializes (which may take some time), there will be prompts for your e-mail, T&C and a subscription to EFF. The e-mail address will be used for notices and lost key recovery.
If everything is successful, there will be an output message that specifies the directory in which the certificate and chain have been stored as well as the expiry date of the certificate. Verify you have the following files inside /etc/letsencrypt/live/example.com (using sudo ls -l):
cert.pem: Domain certificatechain.pem: Let’s Encrypt’s chain certificatefullchain.pem:cert.pem&chain.pemcombinedprivkey.pem: Certificate’s private key
Step 3.3 - Configure TLS/SSL on Nginx
Now that the certificates have been generated, the Nginx configuration has to be modified.
$ sudo nano /etc/nginx/sites-available/ghost
server {
    listen 443 ssl;
    server_name example.com;

    ssl_certificate /etc/letsencrypt/live/example.com/fullchain.pem;
    ssl_certificate_key /etc/letsencrypt/live/example.com/privkey.pem;

    ...

    # certbot-auto
    location ~ /.well-known {
        allow all;
    }
}

server {
    listen 80;
    server_name example.com;
    return 301 https://$host$request_uri;
}
The above configuration allows Nginx to listen on port 443 with SSL enabled and tells it to use the Let’s Encrypt SSL certificate. The new server block at the end of the file redirects any HTTP requests (port 80) to the HTTPS equivalent.
Test the configuration file and restart Nginx if everything is okay.
$ sudo nginx -t
$ sudo service nginx restart
The Let’s Encrypt TLS/SSL certificate is now in place and can be tested by visiting https://example.com.
Step 3.4 - Change Ghost Configuration
Next, the url in config.js has to be changed to its HTTPS equivalent and for increased security, admin pages should be forced to use SSL.
$ sudo nano /var/www/ghost/config.js
production: {
    url: 'https://example.com',
    mail: {},
    forceAdminSSL: true,
    ...
}
Restart Ghost using:
$ sudo service ghost restart
Step 3.5 - Set Up Auto Renewal for Certificate
Let’s Encrypt certificates are only valid for 90 days, however, they can be easily renewed using certbot-auto.
The final step is to set up a cron job that will periodically execute this automatic renewal. Since the renewal first checks for the expiration date and only executes the renewal if the certificate is less than 30 days away from expiration, it is safe to create a cron job that runs every week or every day.
Edit the crontab for the root user using:
$ sudo crontab -e
Add the following lines at the end of the file after selecting an editor:
30 2 * * 1 /usr/local/sbin/certbot-auto renew >> /var/log/le-renew.log
35 2 * * 1 /etc/init.d/nginx reload
This will run certbot-auto renew at 02:30 AM every Monday and restart Nginx at 02:35 AM. The output produced by the renewal command will be piped to a log file located at /var/log/le-renew.log.
Step 4 - Start Blogging!
Finally, simply visit https://example.com/ghost/ and create an account to start blogging. Check out Ghost’s user documentation for questions regarding using Ghost and the developer documentation for questions regarding the inner workings of Ghost.
References
- https://www.digitalocean.com/community/tutorials/how-to-use-the-digitalocean-ghost-application
- https://www.digitalocean.com/community/tutorials/how-to-secure-nginx-with-let-s-encrypt-on-ubuntu-14-04
- http://support.ghost.org/setup-ssl-self-hosted-ghost/
- http://support.ghost.org/config/